Configuring Authentication for a Zed Lake Service
A SuperDB data lake service may be configured to require
user authentication to be accessed from clients such as the
Zui application, the
super db CLI commands, or the
SuperDB Python client. This document describes a simple
Auth0 configuration with accompanying super db serve flags
that can be used as a starting point for creating similar configurations in
your own environment.
Environment
Our example environment consists of the following:
- An Auth0 trial account containing a verified user
testuser@brimdata.io - A Linux VM with IP address
192.168.5.75on which we'll run our Zed lake service - A macOS desktop on which we'll run our Zui app and
zedCLI tooling
Auth0 API Configuration
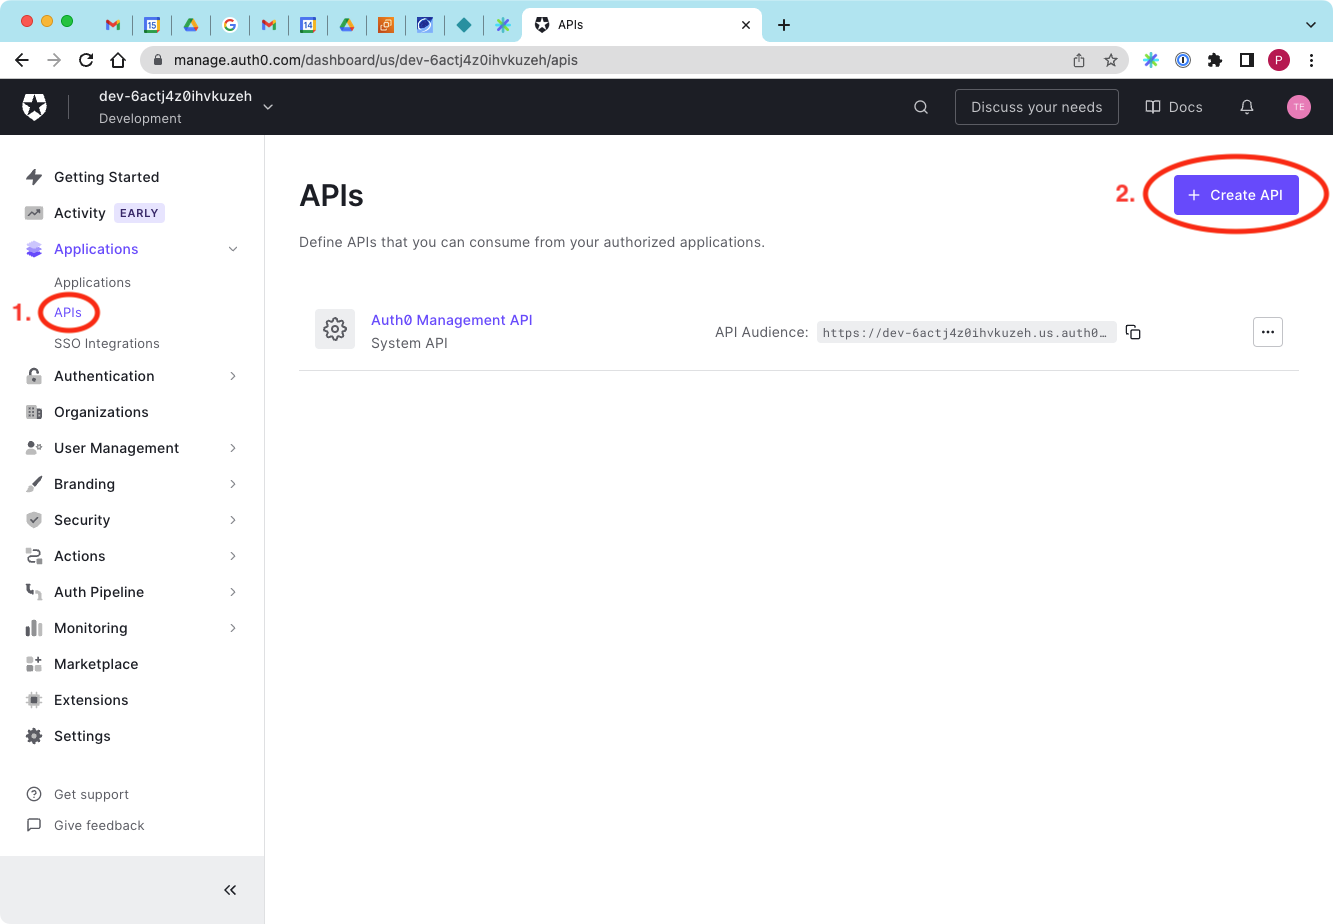
Begin creating a new API by clicking APIs in the left navigation menu and then clicking the Create API button.
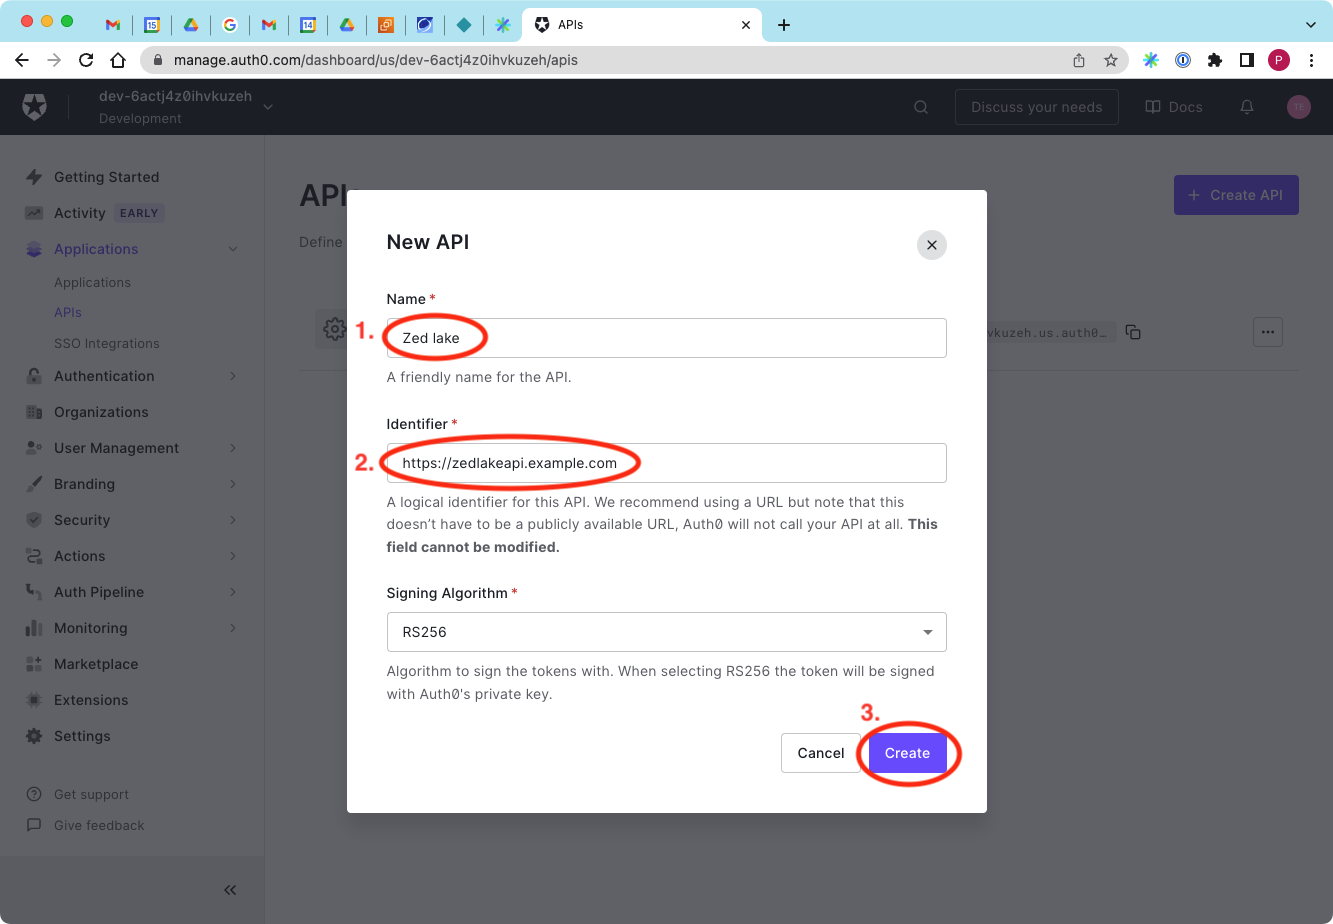
Enter any Name and URL Identifier for the API, then click the Create button.
tipNote the value you enter for the Identifier as you'll need it later for the Zed lake service configuration.
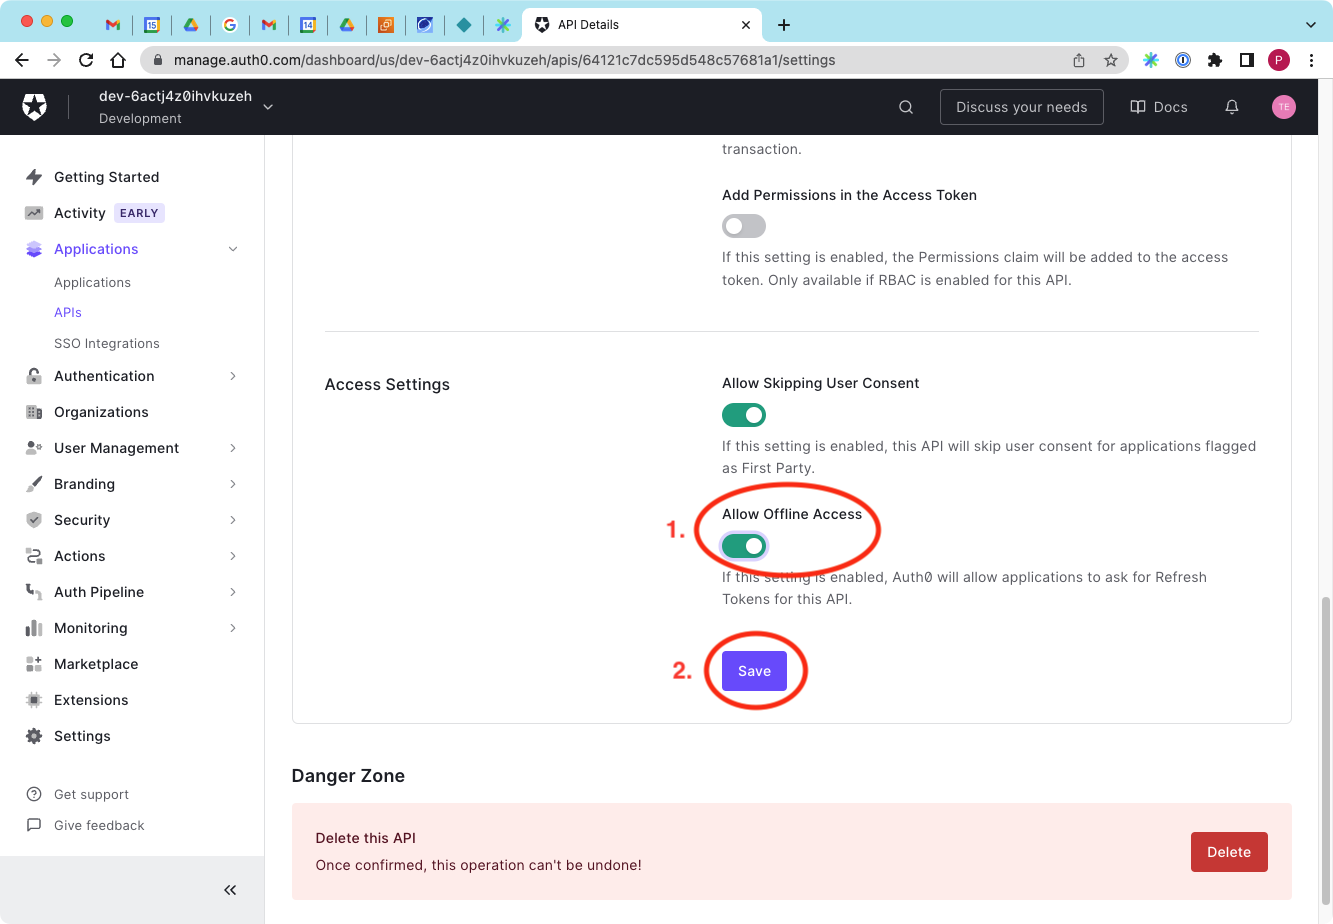
Click the Settings tab for your newly created API.
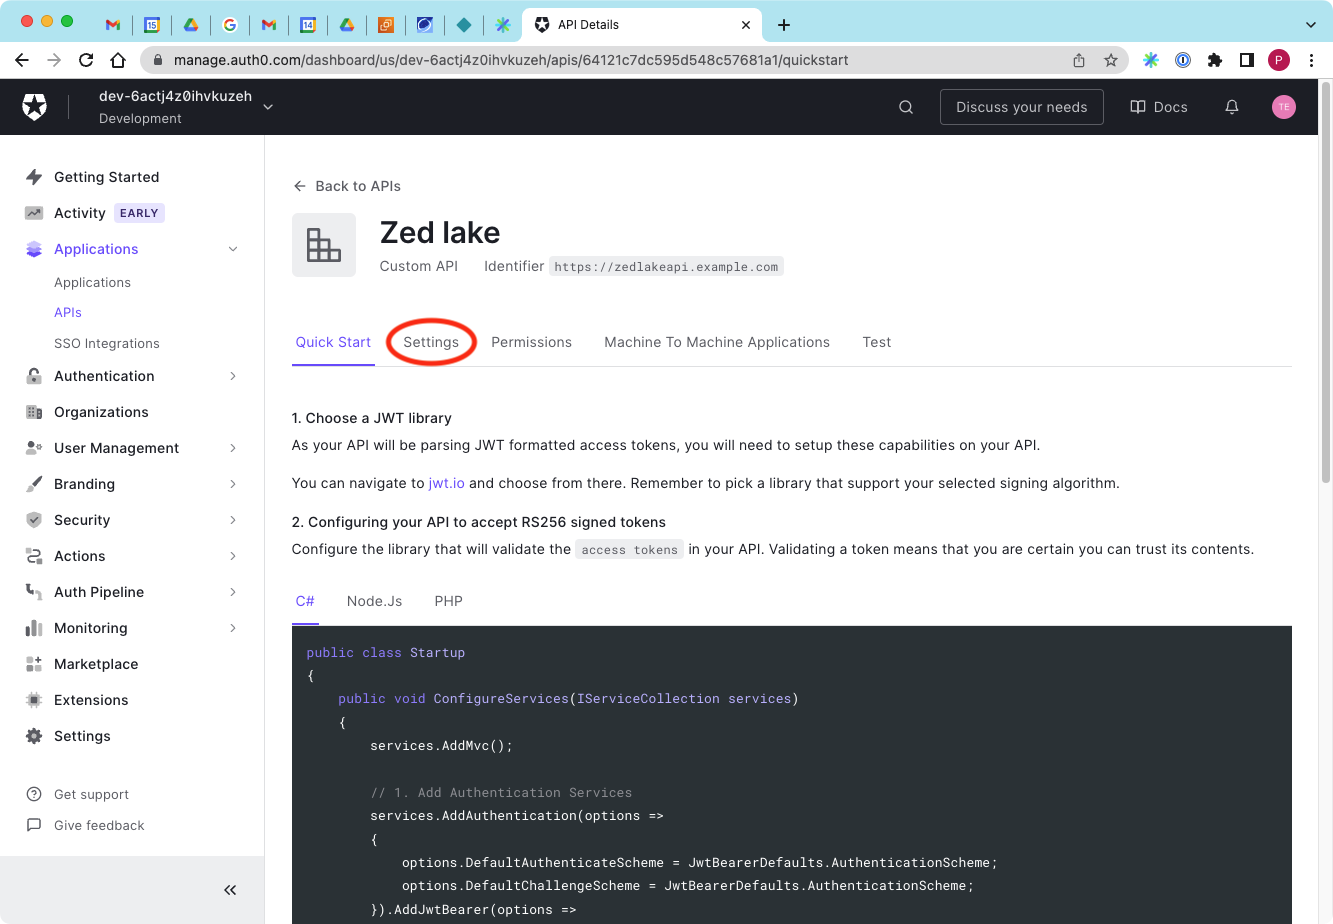
Scroll down in the Settings tab and click the toggle to enable Allow Offline Access, then click the Save button.
Auth0 Application Configuration
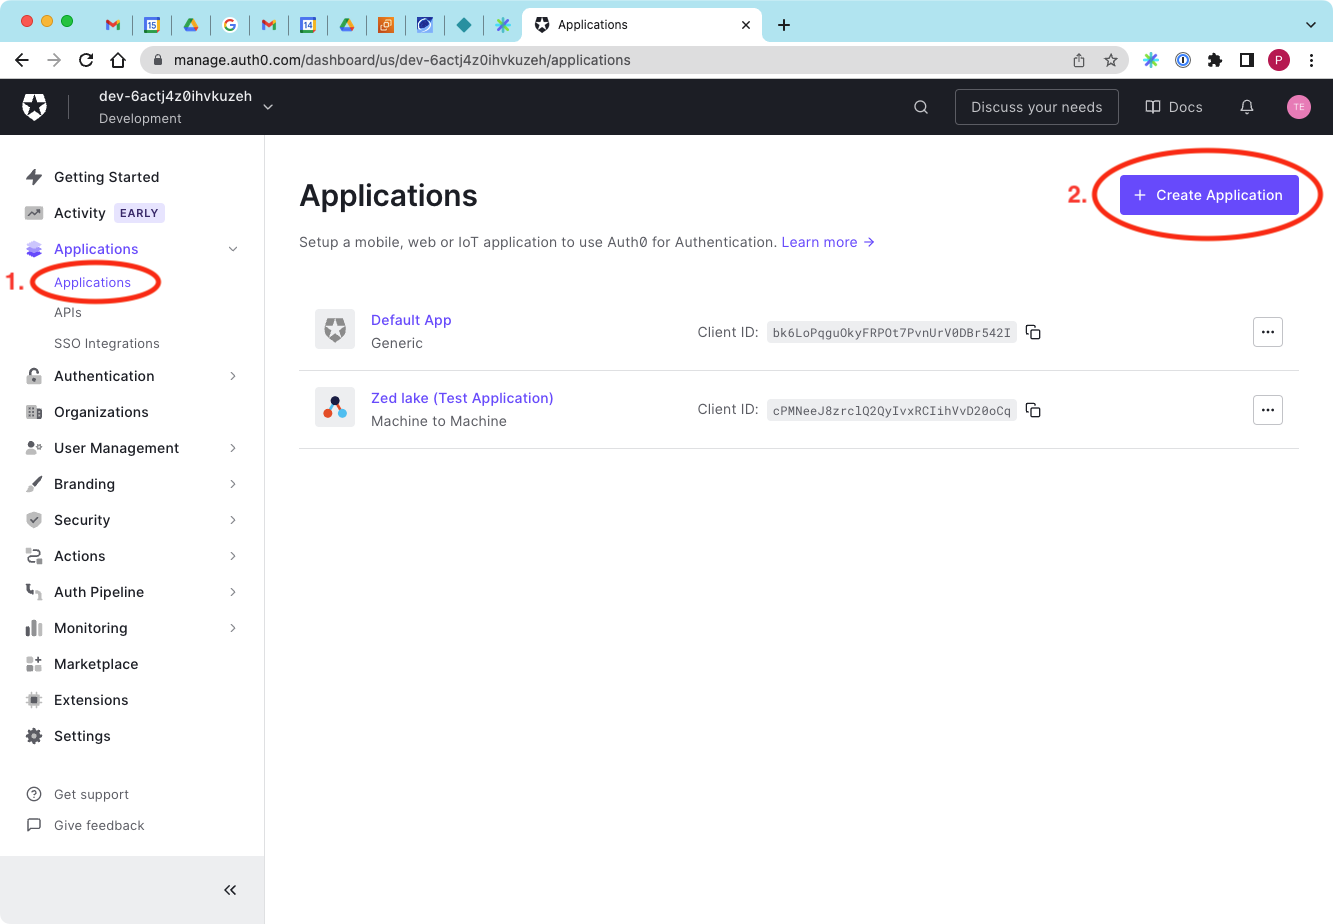
Begin creating a new application by clicking Applications in the left navigation menu and then clicking the Create Application button.
NoteNeither the "Zed lake (Test Application)" that was created for us automatically when we created our API nor the Default App that came with the trial are used in this configuration.
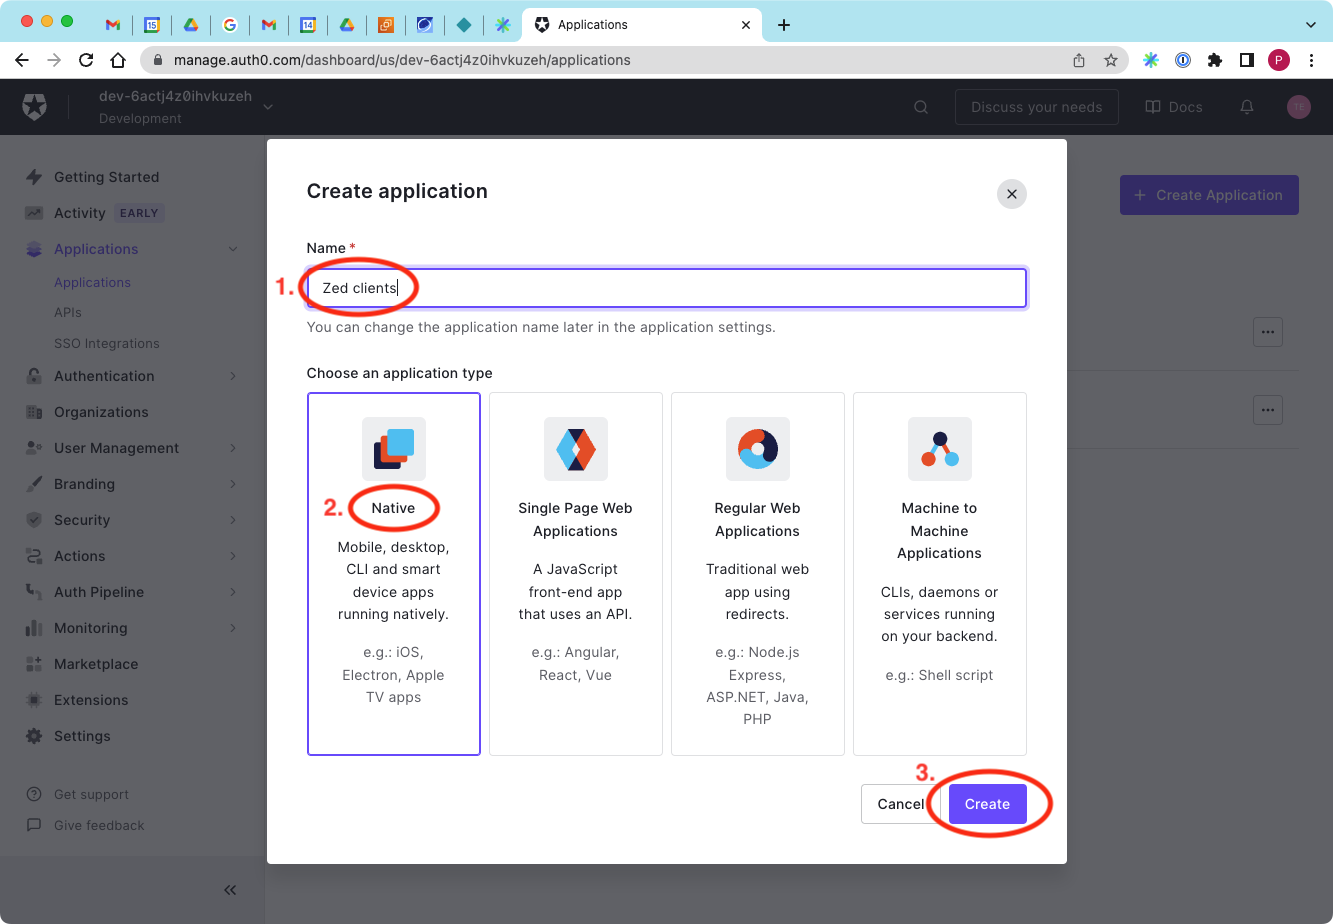
Enter any Name for the application. Keeping the default selection for creating a Native app, click the Create button.
Click the Settings tab for your newly created application.
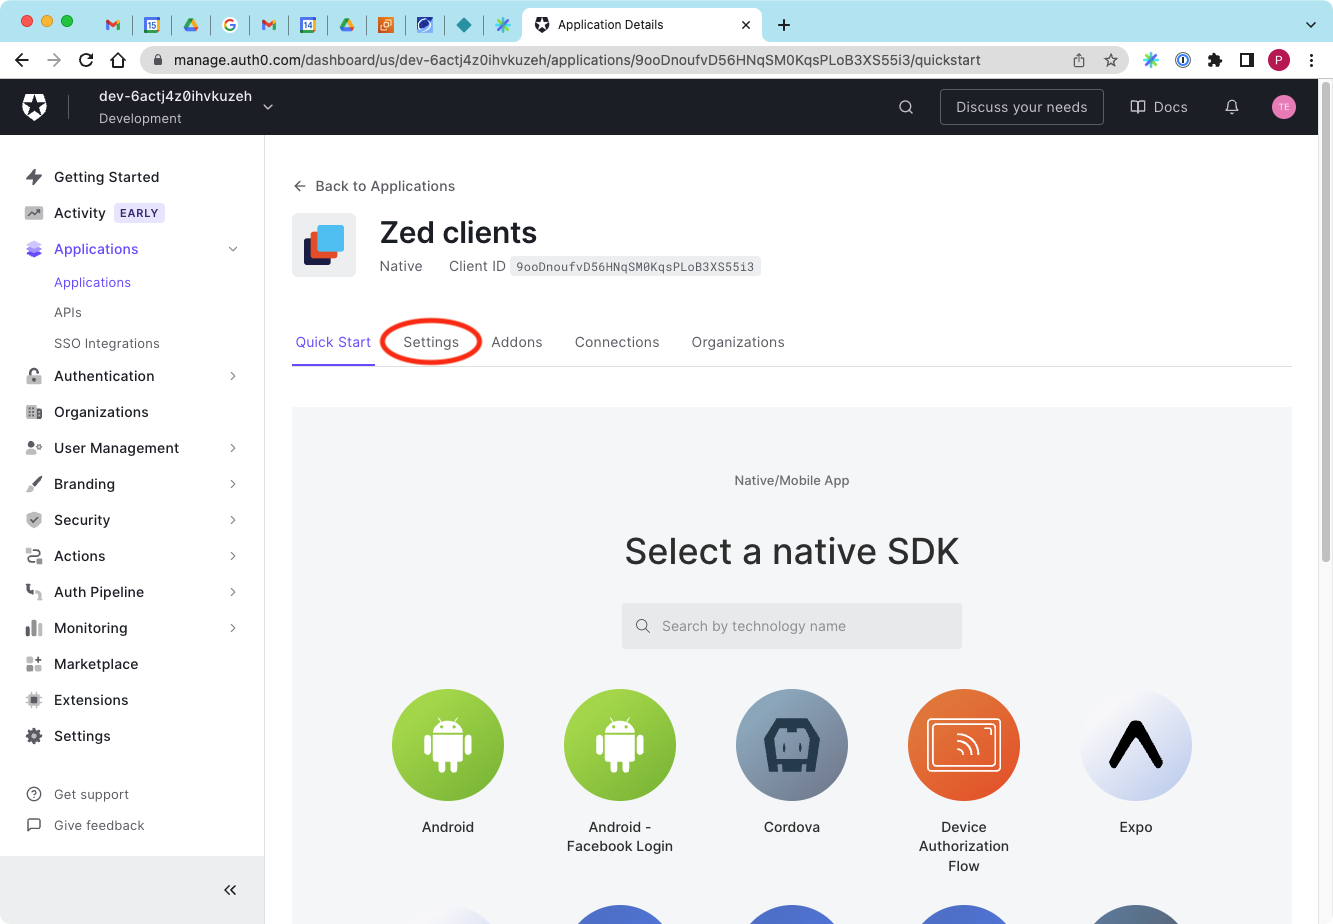
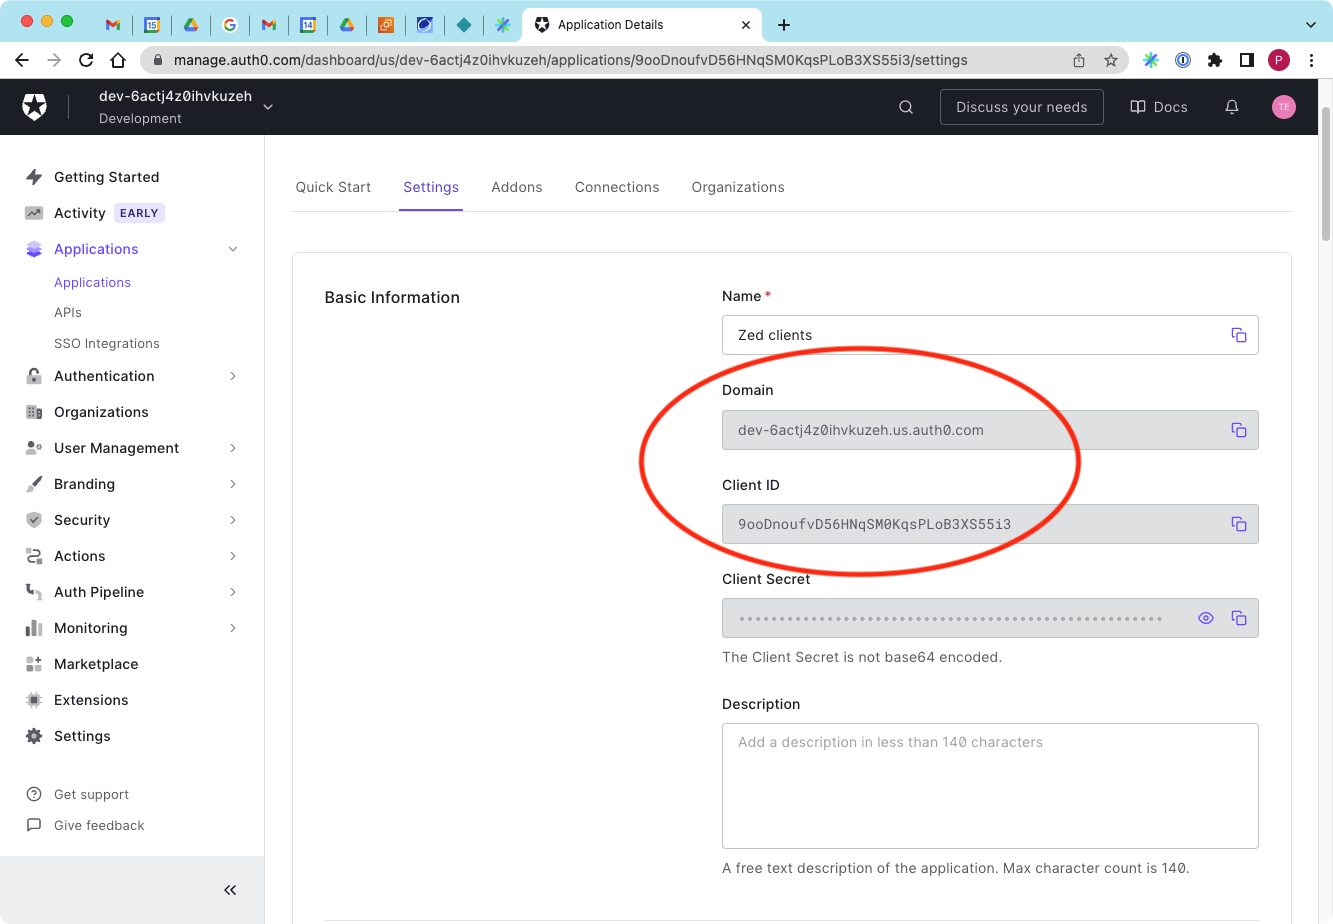
On the Settings tab, note the Domain and Client ID values, as you'll need them later for the Zed lake service configuration.
If you wish to allow authentication from the Zui desktop application, scroll down in the Settings tab to the Allowed Callback URLs and enter the value
zui://auth/auth0/callback.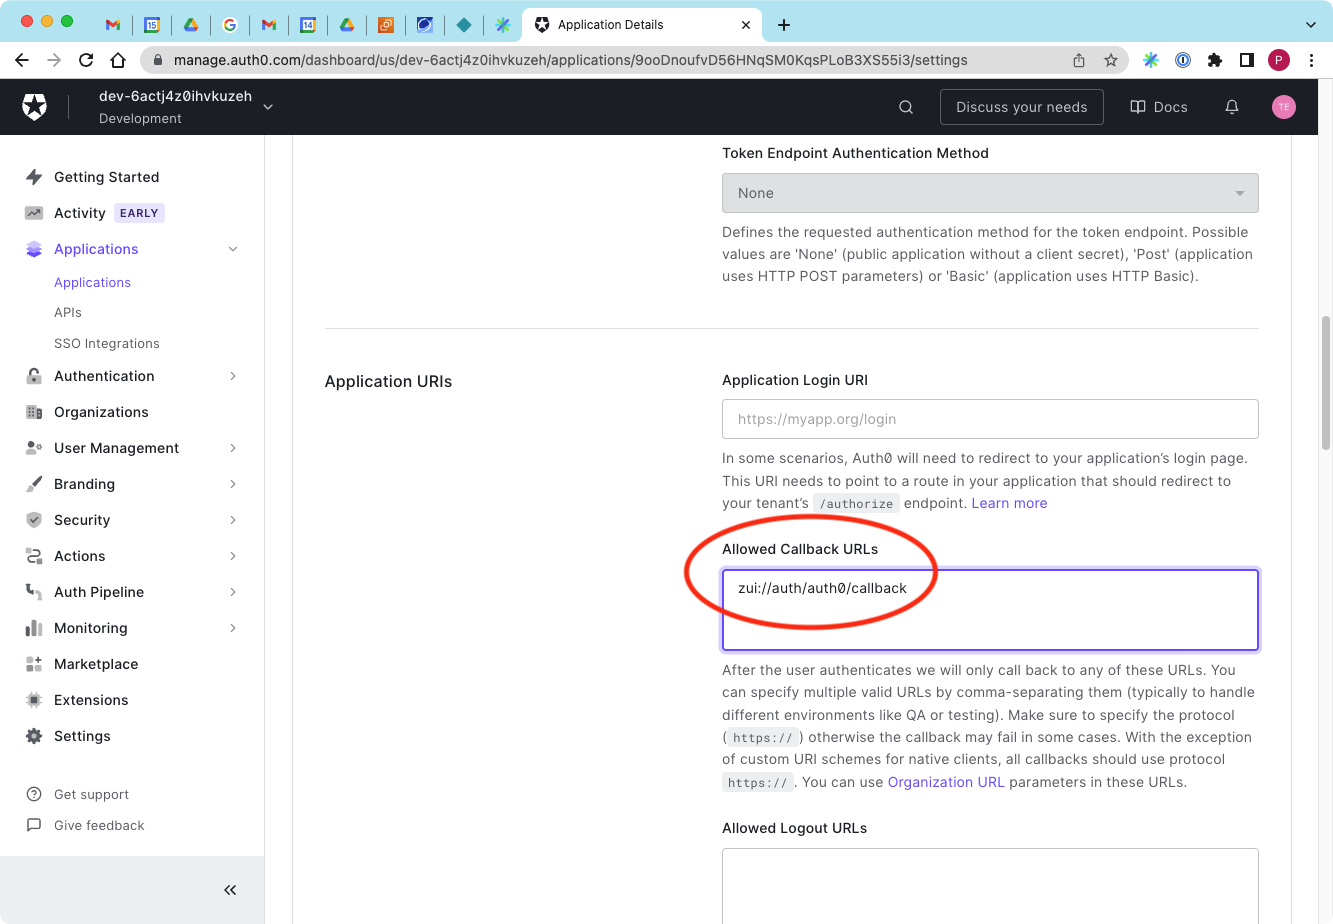
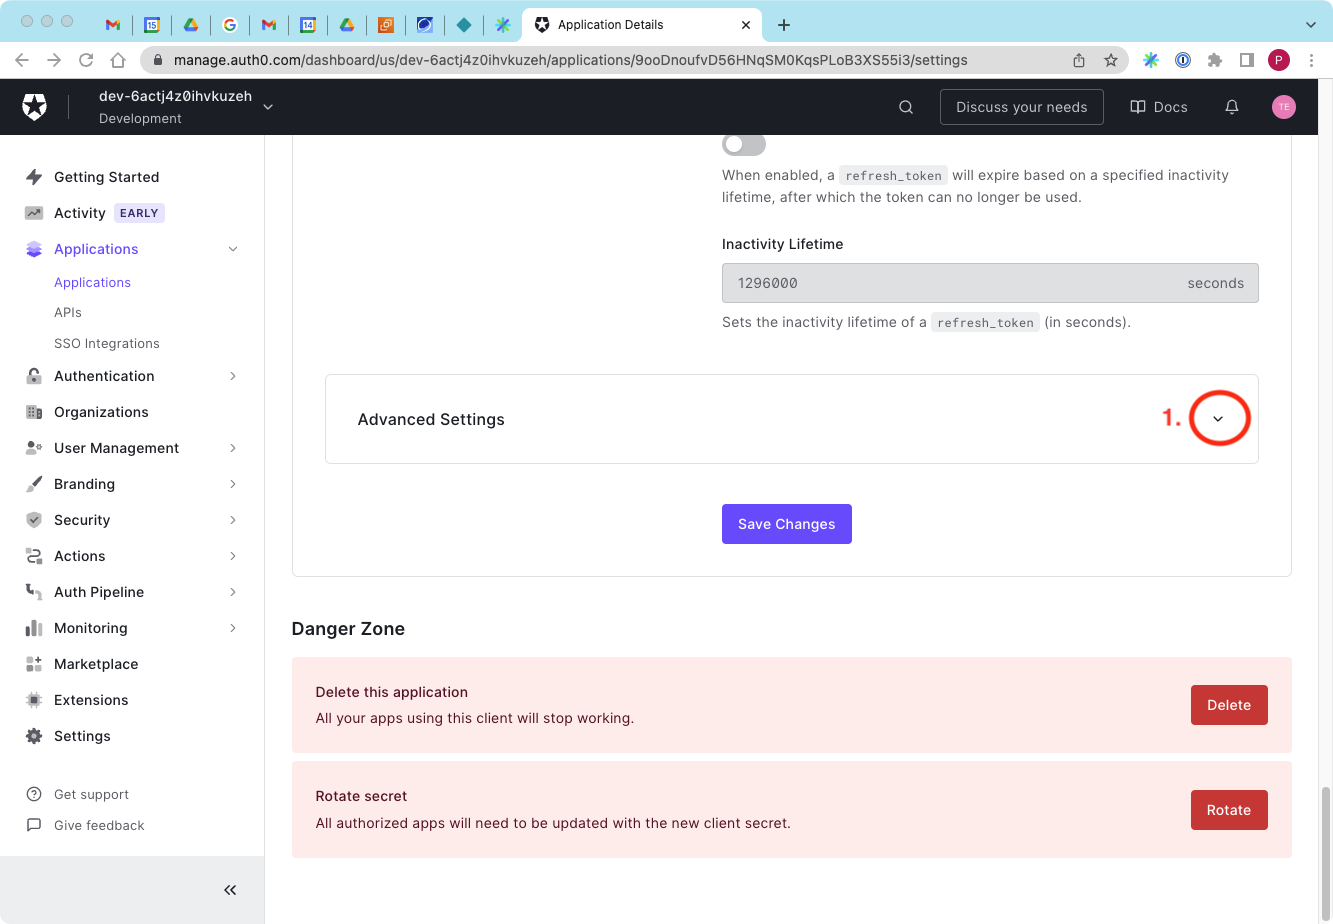
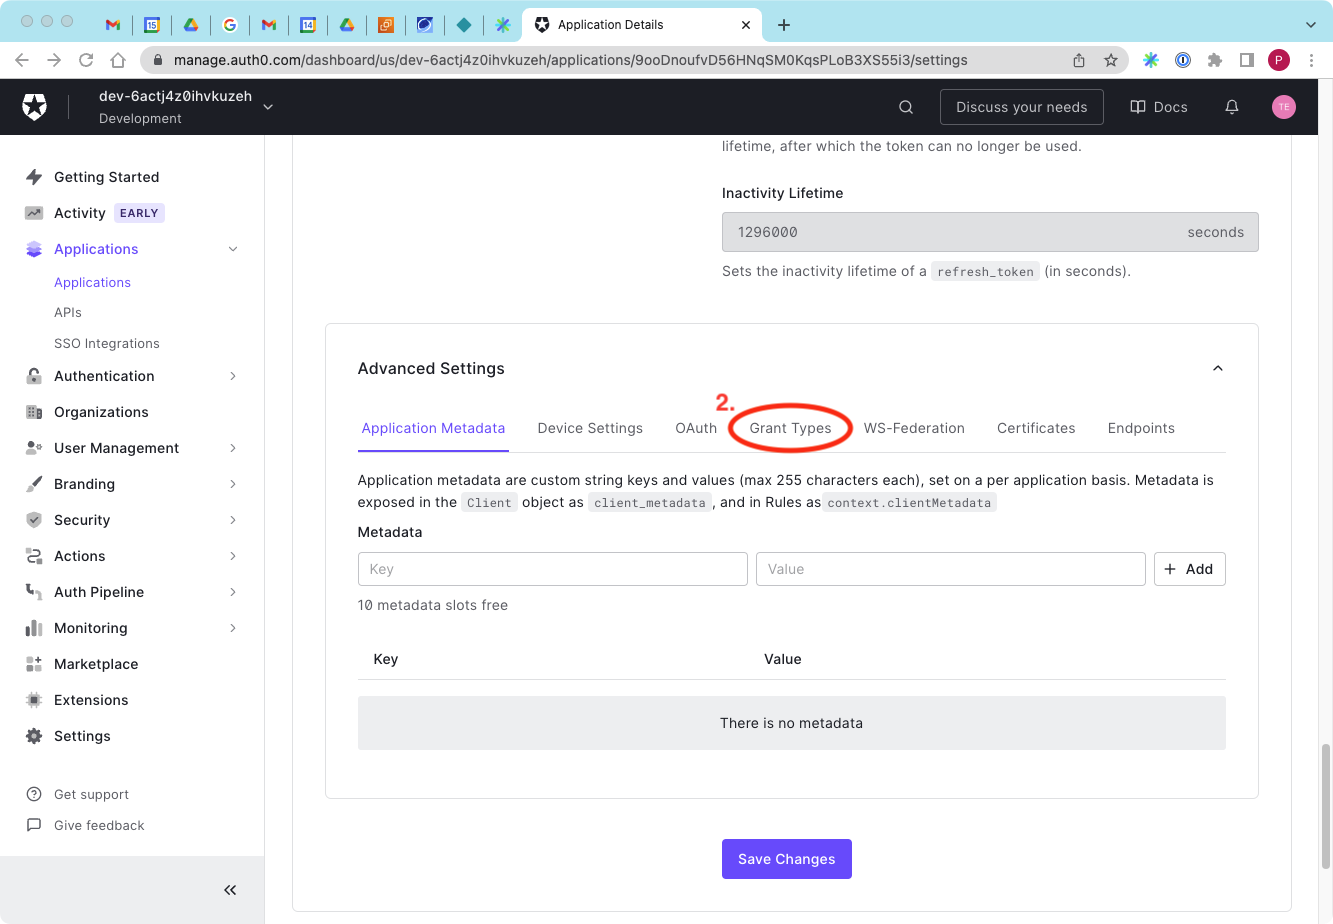
If you wish to allow authentication from the Zed CLI tooling and/or the Python client, scroll down in the Settings tab and expand the Advanced Settings, then click the Grant Types tab, then click the checkbox to enable the Device Code grant type.
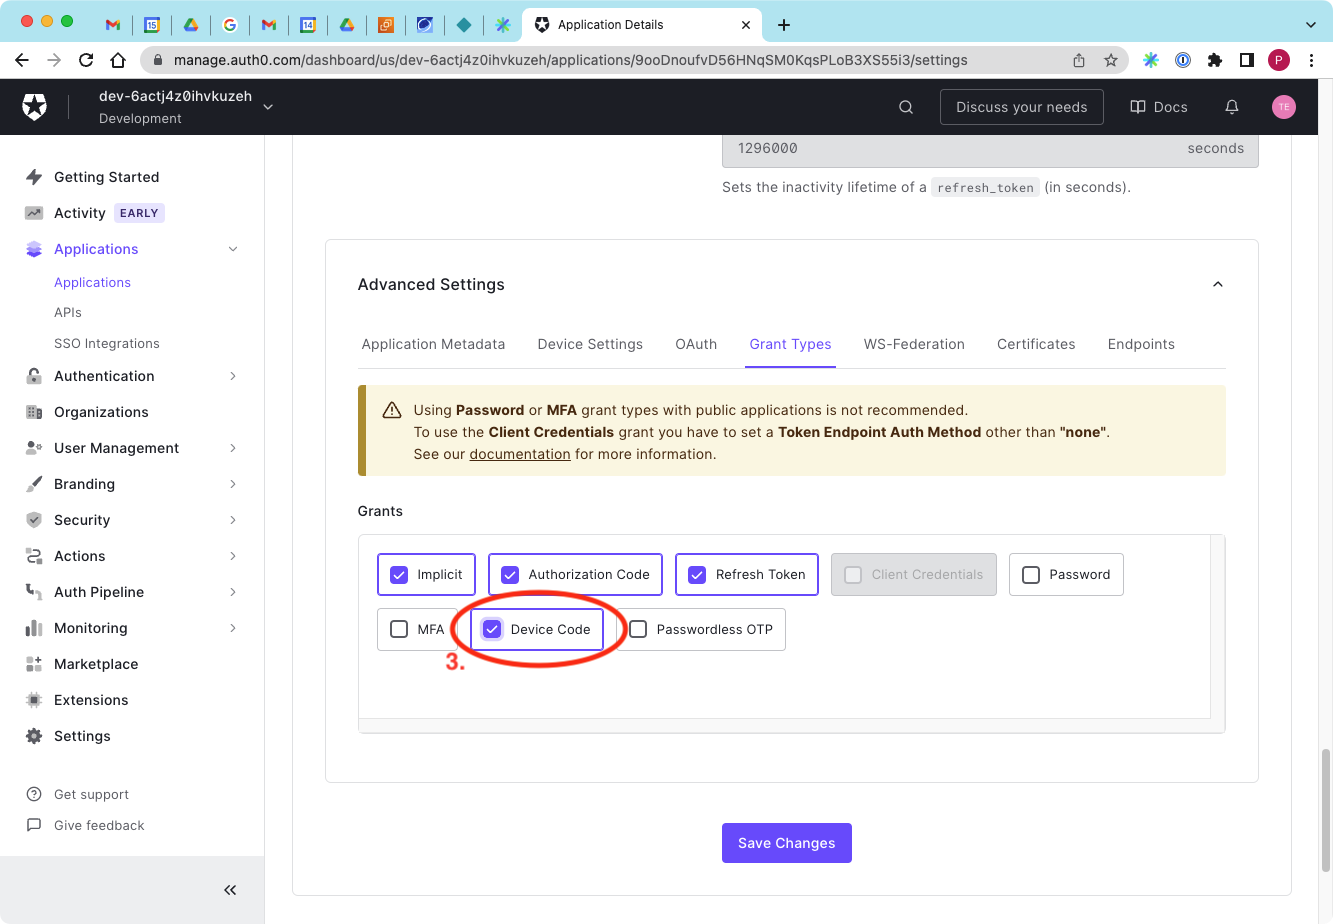
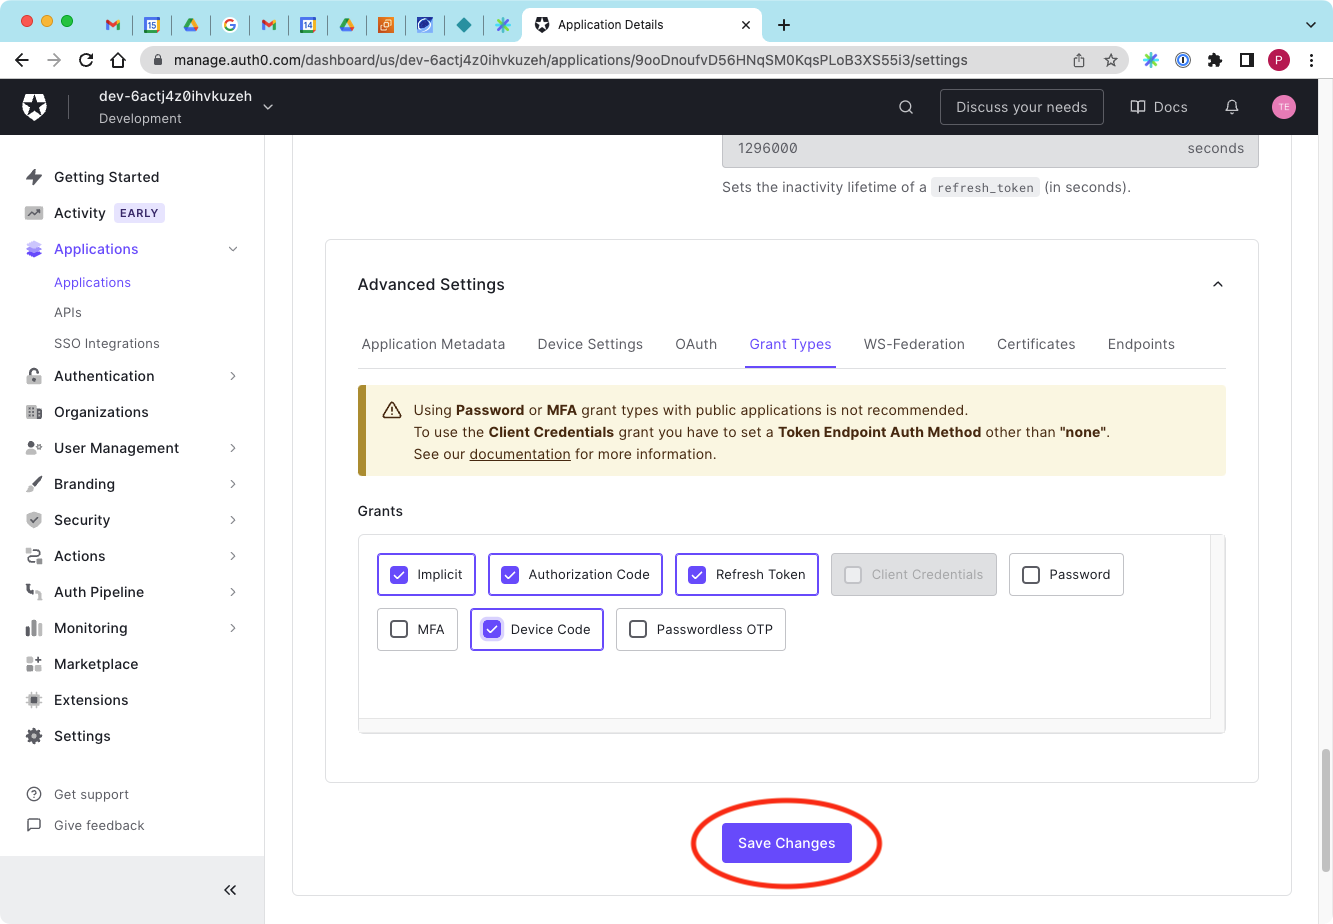
Scroll down to the bottom of the Settings tab and click the Save Changes button.
Zed Lake Service Configuration
Login to our Linux VM and install the most recent Zed tools from source.
$ go install github.com/brimdata/super/cmd/zed@latest
go: downloading github.com/brimdata/super v1.6.0

$ zed -version
Version: v1.6.0
Set shell variables with the values you noted previously from the Auth0 configuration for the API Identifier and the Domain and Client ID values from the application configuration. Make sure the
https://prefix is included in the Identifier value.$ auth0_api_identifier=https://zedlakeapi.example.com
$ auth0_clientid=9ooDnoufvD56HNqSM0KqsPLoB3XS55i3
$ auth0_domain=https://dev-6actj4z0ihvkuzeh.us.auth0.comDownload the JSON Web Key Set for the domain.
$ curl -O $auth0_domain/.well-known/jwks.jsonStart the Zed service, specifying the required flags for the authentication configuration along with a directory name for lake storage.
$ zed serve \
    -auth.enabled \
    -auth.clientid=$auth0_clientid \
    -auth.domain=$auth0_domain \
    -auth.jwkspath=jwks.json \
    -auth.audience=$auth0_api_identifier \
    -lake=lake

{"level":"info","ts":1678909988.9797907,"logger":"core","msg":"Started"}
{"level":"info","ts":1678909988.9804773,"logger":"httpd","msg":"Listening","addr":"[::]:9867"}
...
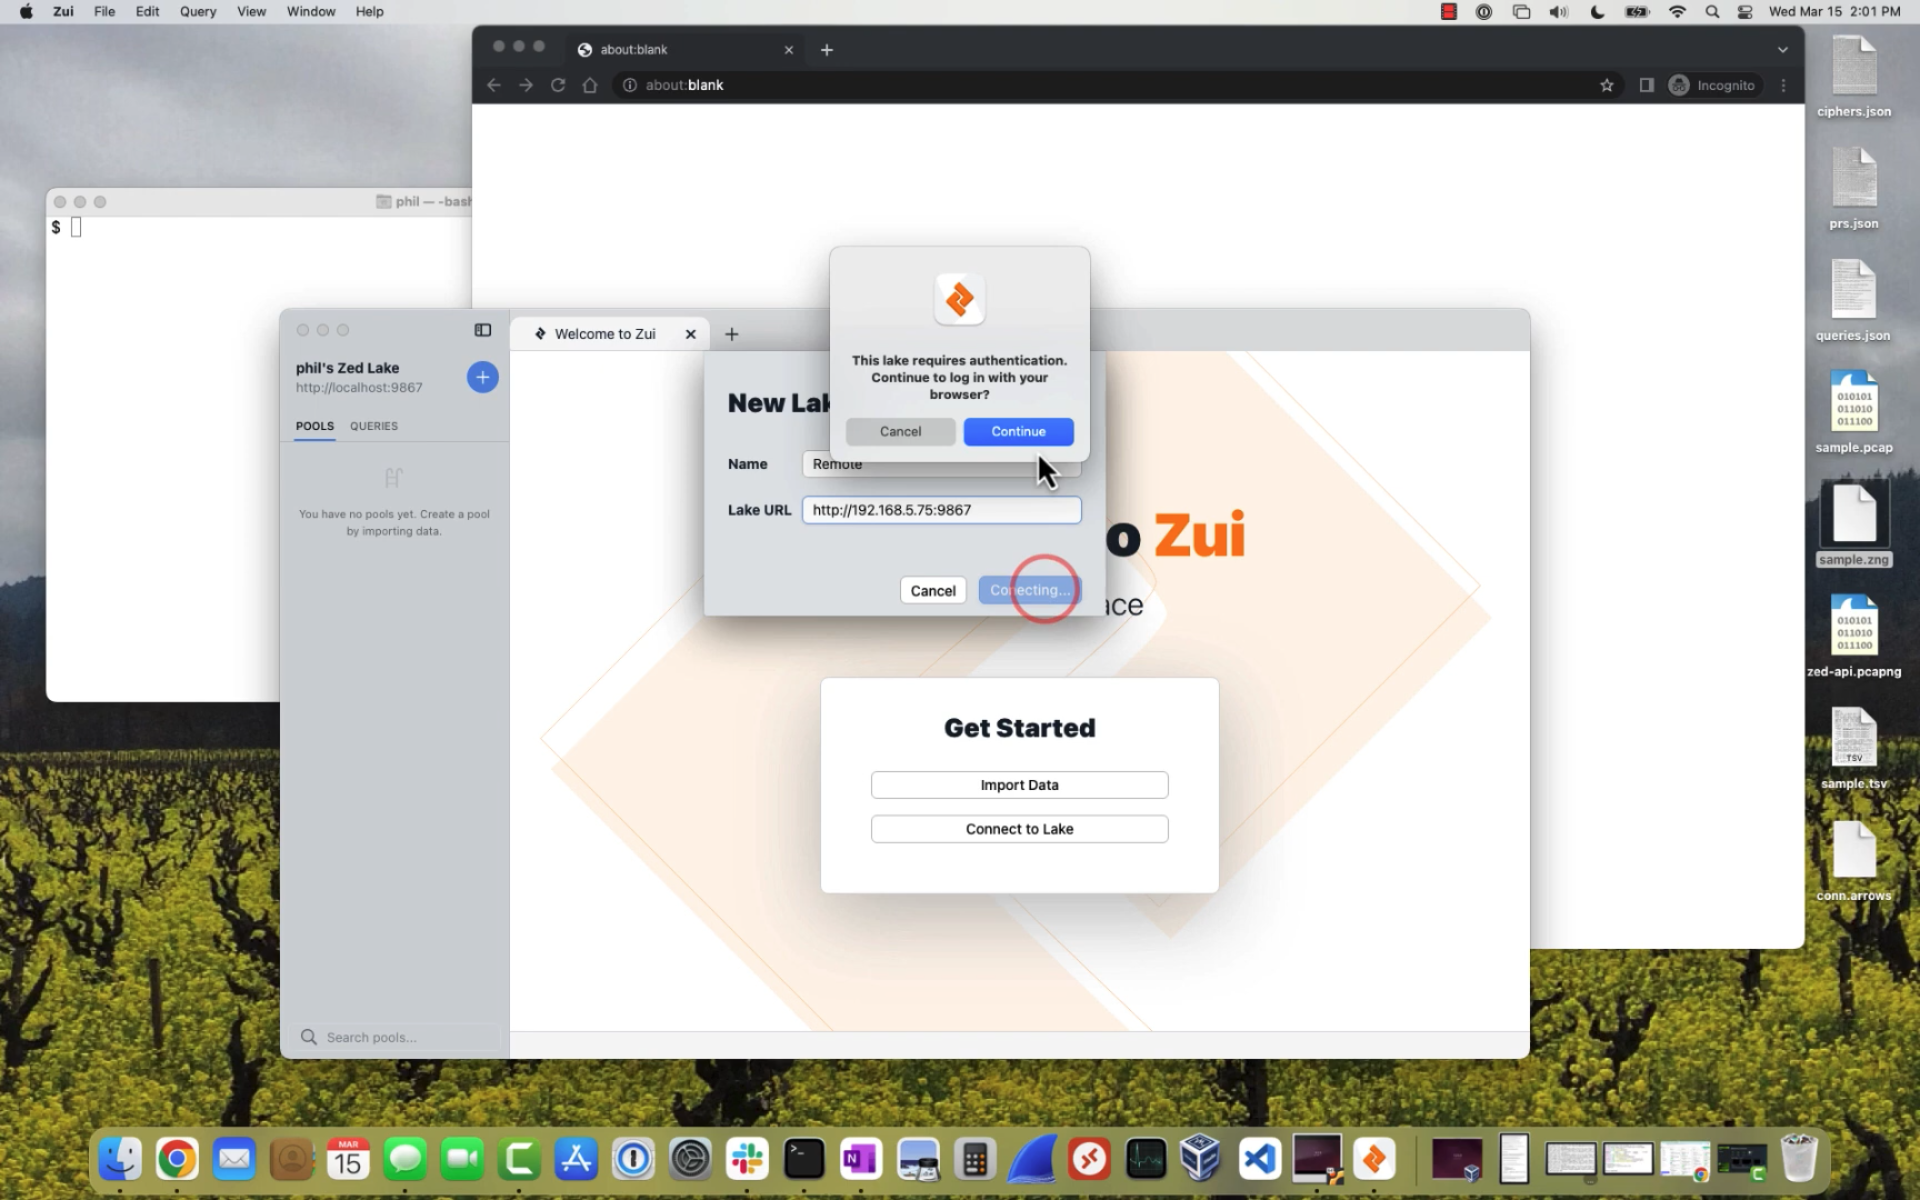
Authenticated Login Flow
Now that we've configured both Auth0 and the Zed lake service, we can test the authenticated login flow with our Zed clients. The video below shows this using Zui v1.0.0 and the Zed CLI tooling and Zed Python client v1.6.0.
Summary:
After clicking Add Lake in Zui and entering a Name and our Lake URL, the Zed lake service redirects the user to Auth0 to complete authentication. Once authentication succeeds, Auth0 redirects back to Zui and the user can begin operating with the lake. The user can log out by clicking the lake URL in the left navigation menu, then clicking Get info, then clicking Logout.
Before starting the authentication flow with the Zed CLI tooling, ensure the
ZED_LAKEenvironment variable is pointing at the appropriate lake URL. Oncezed auth loginis executed, the Zed lake service redirects the user to Auth0 where a device code is displayed that can be compared against the one shown by the Zed CLI. Once the user clicks the Confirm button, the user has authenticated and can begin operating with the lake. The credentials are cached in$HOME/.zed. The user can log out viazed auth logout.As the Python client depends on the same authentication used by the Zed CLI tooling, you can begin authenticated operations in the Python client once completing the previous step.
Video: